Как установить DHCP для моего компьютера перед установкой беспроводного маршрутизатора netis?
This instructions is for the following operating systems:
Windows XP/ Windows Vista/ Windows 7/ Windows 8, MAC OS
Windows XP
Please follow the steps below to setup your computer:
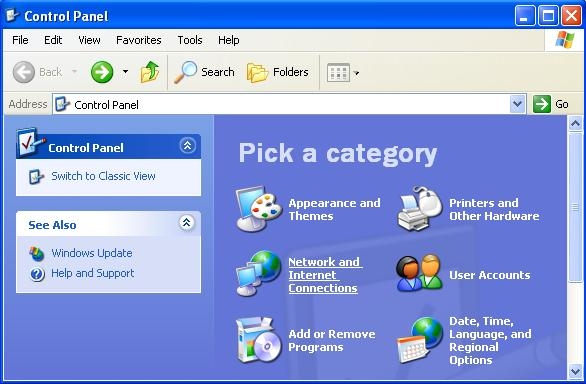
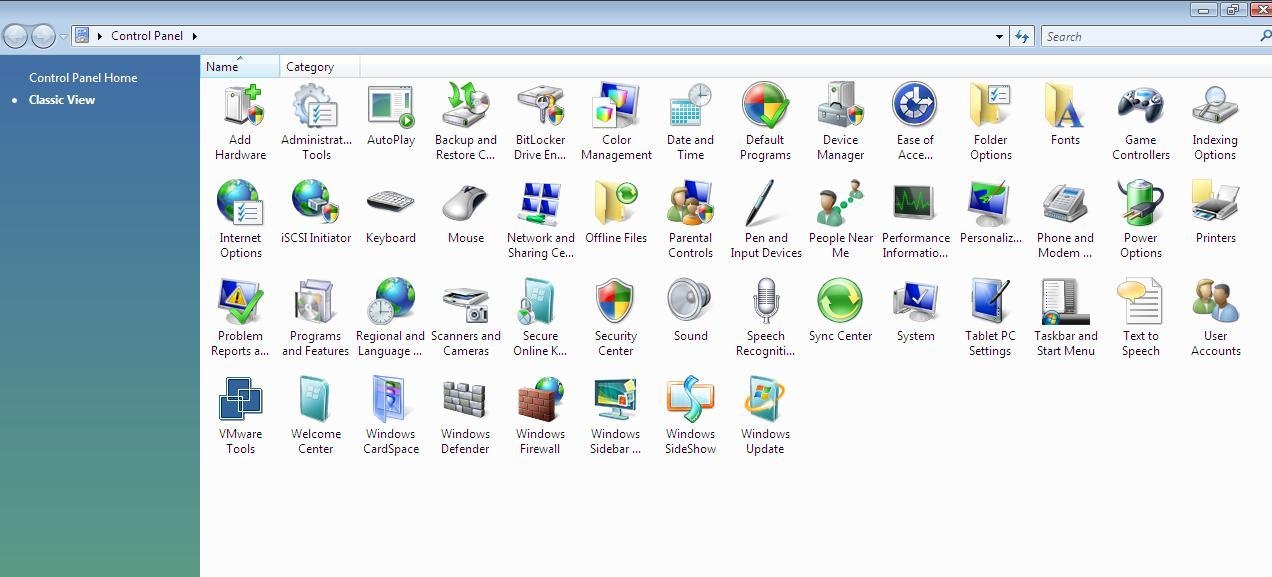
Step 1. Go to Start -->Settings --> Control Panel.
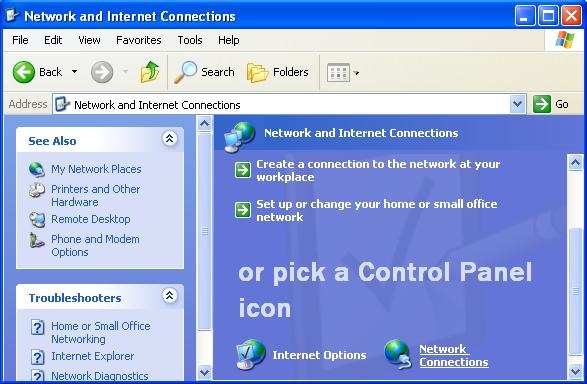
Step 2. Click Network and Internet Connections.
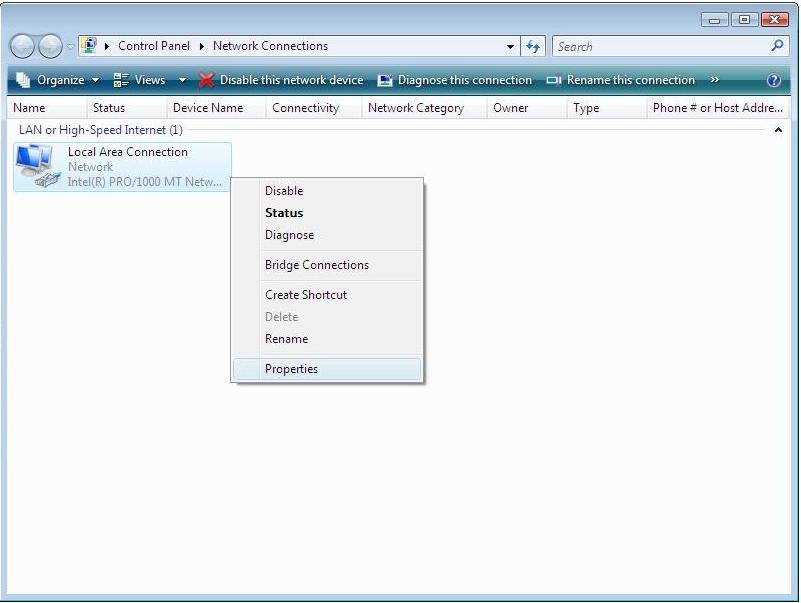
Step 3. Click Network Connections.
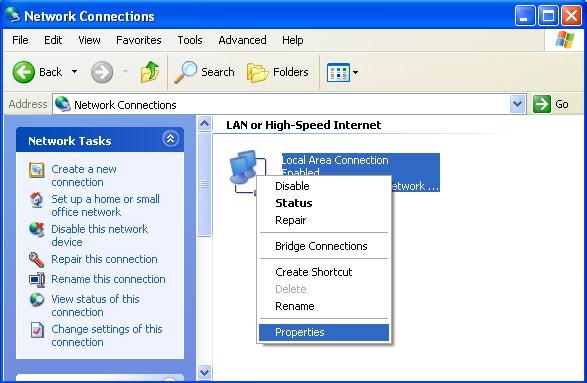
Step 4. Right-click on Local Area Connection and left-click on Properties.
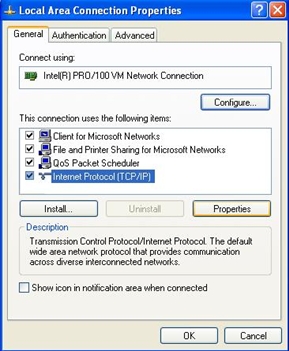
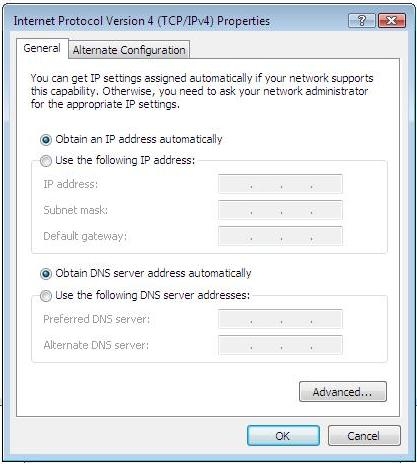
Step 5. Right-click on Internet Protocol (TCP/IP), and then click on Properties.
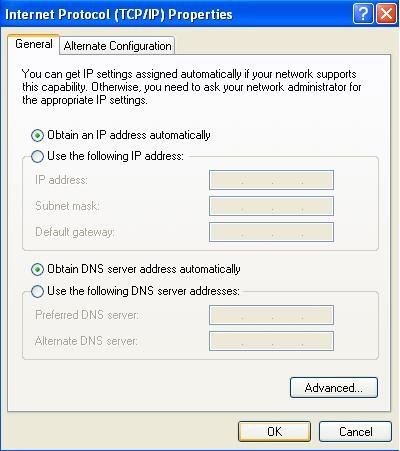
Step 6. Choose Obtain an IP address automatically and Obtain DNS server address automatically, and then click OK to close the Internet Protocol (TCP/IP) Properties window.
Step 7. Click Close button to close the Local Area Connection Properties window.

Windows Vista
Please follow the steps below to setup your computer:
Step 1. Go to Start --> Settings --> Control Panel.
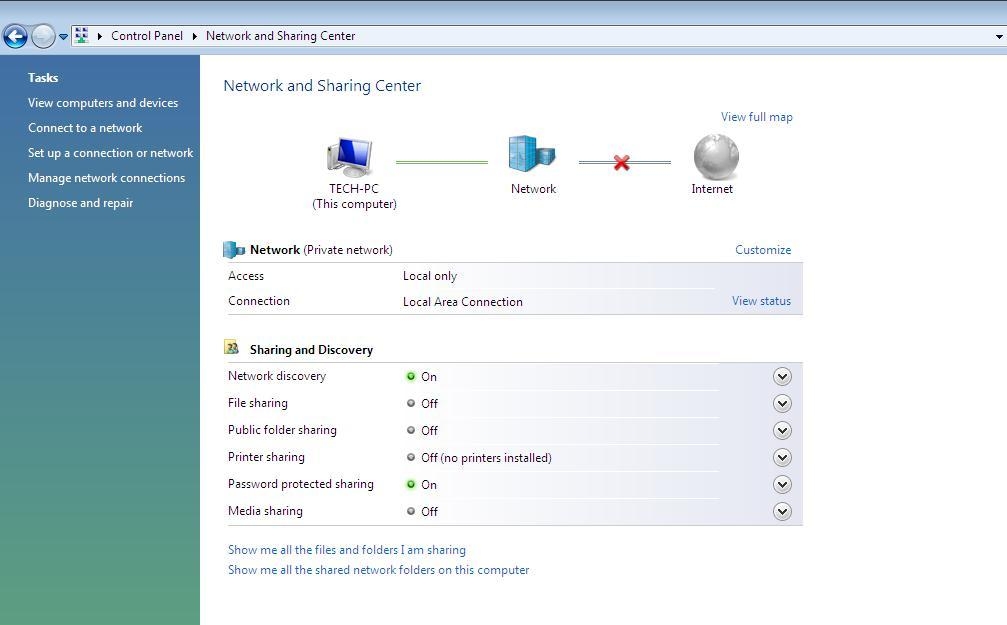
Step 2. Click Network and Sharing Center.
Step 3. Click Manage Network Connections.
Step 4. Right-click on the icon Local Area Connection, left-click Properties.
Step 5. Select Internet Protocol Version 4 (TCP/IP) and then left-click Properties.
Step 6. Choose Obtain an IP address automatically and Obtain DNS server address automatically, and then click OK to close the Internet Protocol (TCP/IP) Properties window.
Step 7. Click OK to close the Local Area Connection Properties window.
Windows 7
Please follow the steps blow to setup your computer:
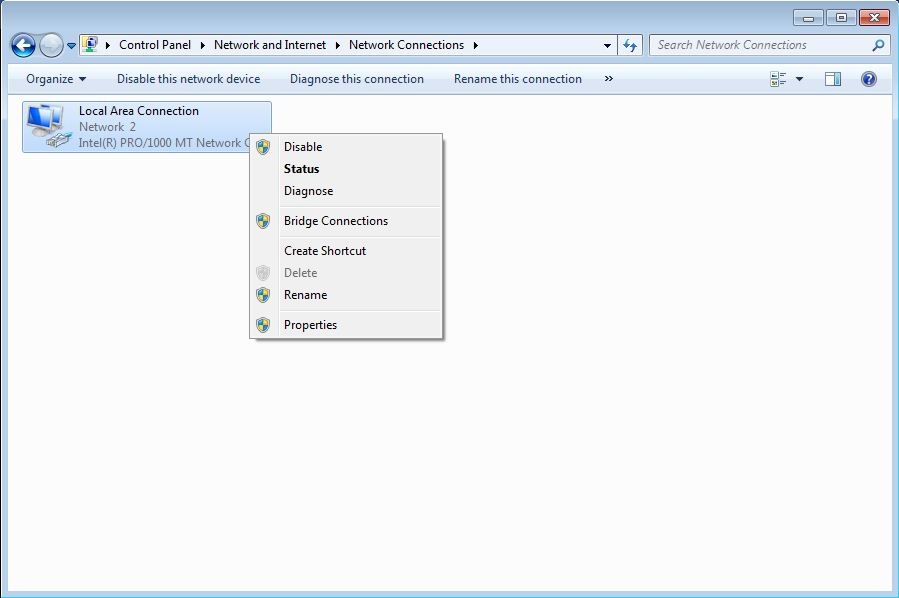
Step 1. Go to Start→Control Panel→Network and Internet.
Step 2. Click Network and Sharing Center→Change adapter settings.
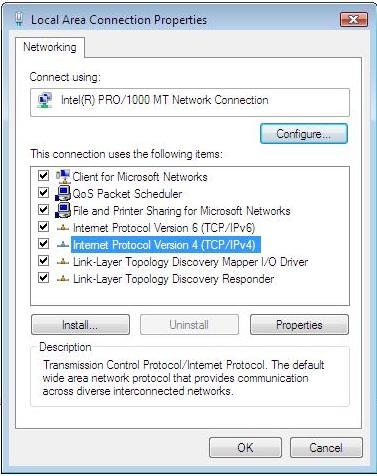
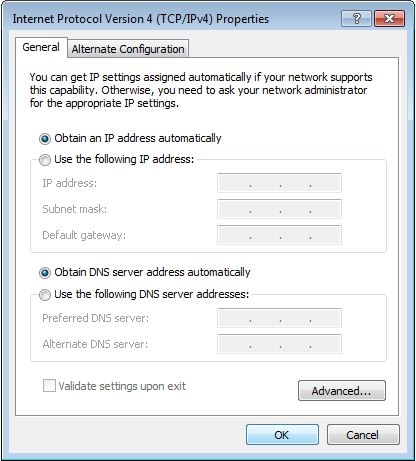
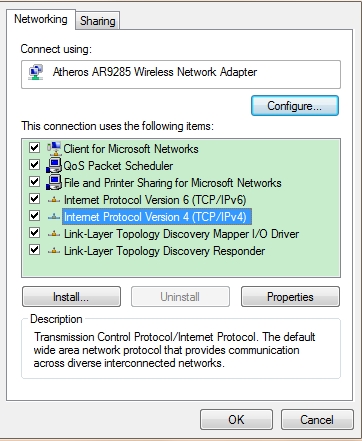
Step 3. Right-click Local Area Connection, left-click Properties. Select Internet Protocol version 4 (TCP/IPv4).
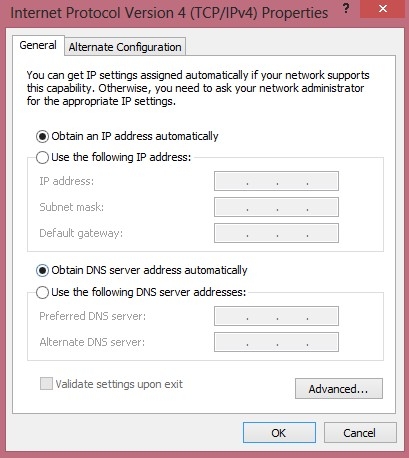
Step 4. Choose Obtain an IP address automatically and Obtain DNS server address automatically, and then click OK to close the window.
Step 5. Click OK to close the Local Area Connection Properties window.
Windows 8
Please follow the steps blow to setup your computer:
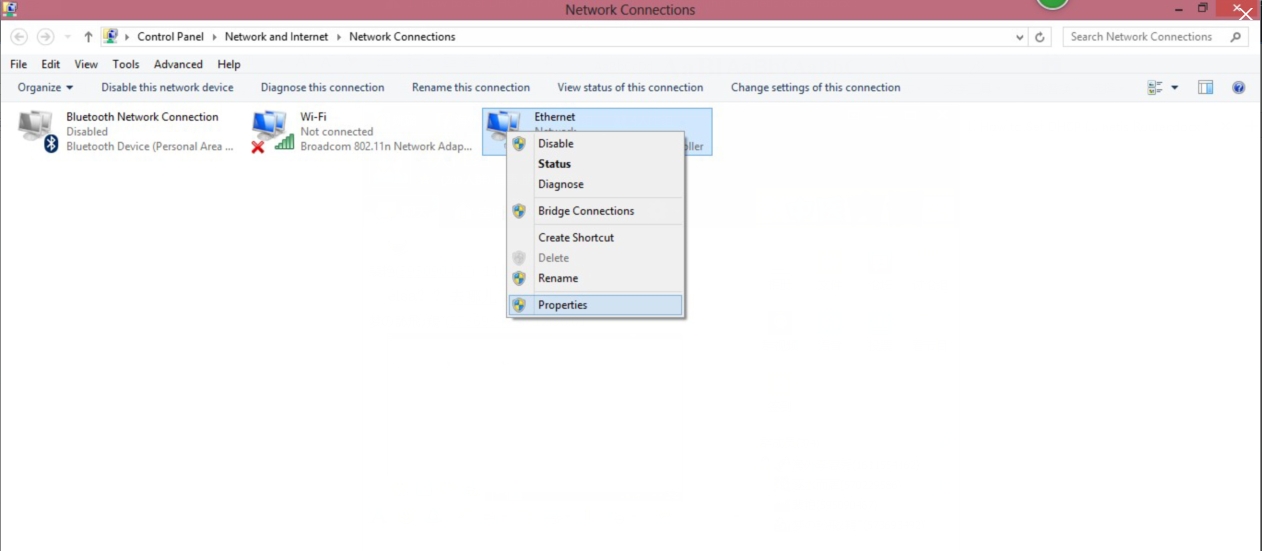
Step 1. Go to Start→Control Panel→Network and Sharing Center.
Step 2. Click Network Connectors→Ethernet, left-click Properties. Select Internet Protocol version 4 (TCP/IPv4).
Step 3. Choose Obtain an IP address automatically and Obtain DNS server address automatically, and then click the OK to close the window.
Step 4. Click OK to close the Local Area Connection Properties window.
MAC OS
Please follow the steps blow to setup your computer:
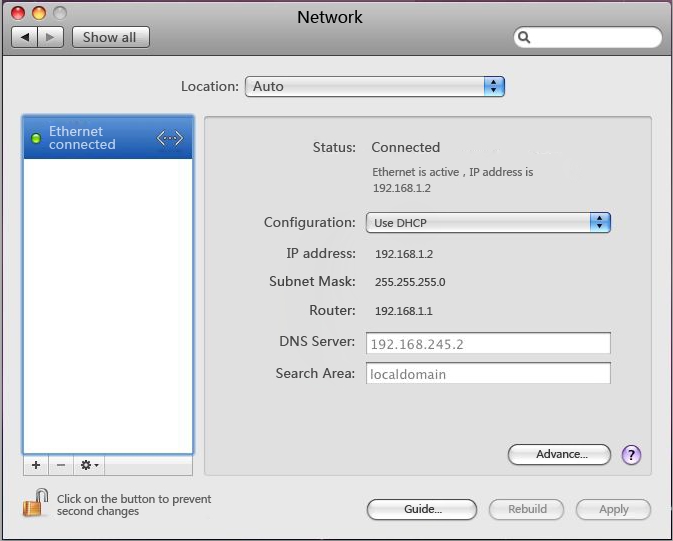
Step 1. Go to Start→System preference Settings→Network.
Step 2. Click Network, Select Use DHCP at the Configuration bar, the system will get the IP address automatically.
Click on Apply button to complete this operation and close the window.


 Global (English)